How to
How to See Who You Unfollowed on Tiktok

If you’re like most people, you probably follow a lot of people on TikTok. And, if you’re like most people, you’ve probably unfollowed a few people here and there. Whether it’s because you don’t like their content or they just don’t interest you anymore, there are a variety of reasons why someone might get unfollowed.
But, how can you tell who you’ve unfollowed? Well, there’s actually a pretty simple way to do it. Here’s how to see who you unfollowed on TikTok:
1) Open the app and go to your profile page.
2) Tap the three dots in the top right corner of the screen.
3) Select “Manage followers.”
4) Under “Following,” tap “Unfollowed.”
5) Here, you’ll see a list of everyone you’ve unfollowed in reverse chronological order.
How To Check Who Unfollowed You On Tiktok
How Do You See Who is Unfollowed on TikTok?
There is no specific feature on TikTok that allows users to see who has unfollowed them, but there are a few ways to tell. One way is to check your follower count regularly and compare it to the number of followers you had before. If there is a sudden drop in your follower count, it’s likely that someone has unfollowed you.
Another way to tell if someone has unfollowed you on TikTok is by looking at your list of followers and seeing if anyone who used to be there is no longer present. This isn’t always accurate, however, as people can delete their accounts or change their usernames, which would also cause them to disappear from your list of followers. If you’re really wanting to know who has unfollowed you on TikTok, your best bet is to reach out to them directly and ask.
Chances are, if they’ve unfollowed you, they don’t want you to know about it, so they probably won’t respond back anyway. But it doesn’t hurt to try!
How Do You See Who You Were Following on Tiktok?
If you’re wondering how to see who you were following on TikTok, don’t worry – it’s a pretty simple process! Just follow these steps: 1. Open the TikTok app and log in to your account.
2. Tap on the “Me” tab at the bottom of the screen. 3. On the Me page, tap on the “Following” option near the top of the page. 4. Here, you’ll see a list of all the users that you’re currently following on TikTok.
If you want to see who you were previously following, simply scroll down to the “Following History” section and tap on it.
What Happens When You Unfollow Someone on TikTok?
When you unfollow someone on TikTok, their content will no longer appear in your feed. You will also no longer receive notifications when they post new videos. If you decide to follow them again at a later date, all of their past content will reappear in your feed.
Does It Show When You Unfollow Someone on TikTok?
It is not possible to see who has unfollowed you on TikTok. There is no notification or any indication within the app that will show users who have unfollowed you. The only way to tell if someone has unfollowed you is to check your follower count periodically to see if it has gone down.
I Accidentally Unfollowed Someone on Tiktok
If you’ve accidentally unfollowed someone on TikTok, don’t worry – you can easily find and follow them again. Here’s how: Open the TikTok app and go to your Profile.
Tap Following at the top of the screen. Search for the person you want to follow in the search bar at the top of the screen. Tap Follow next to their name.
That’s all there is to it! Now you’re following them again and can see their videos in your feed.
Conclusion
If you’re wondering how to see who you unfollowed on Tiktok, there’s an easy way to do it. Just go to your profile and tap the three dots in the top right corner. From there, tap “Manage followers.”
You’ll see a list of everyone you’re following, as well as those who are following you back and those who you’ve unfollowed.

For some, embracing the shadow side of life may be a thrilling adventure full of power, mystery, and excitement; for others, though, it can be a terrifying idea. In this exciting saga’s How to Live as a Villain Ch 94, we learn more about the complexities of villainy and the meaning of living on the edge.
Understanding Chapter 94
How to Live as a Villain Ch 94, is a watershed moment. Opportunities, difficulties, and moments of truth abound in this chapter. In order to survive the perilous underworld, our hero must face their own shadow and the consequences of their actions.
Embracing the Villainous Lifestyle
To really embody the villain lifestyle, one must undergo a metamorphosis beyond mere naughtiness. A character must develop an air of unique savagery and cunning if they are to fully represent the evil.
Cultivating a Villainous Mindset
A genuine villain lives each day with a clear goal in mind and an iron will. To get what they want, they aren’t scared to defy authority and do things differently. They achieve success by embracing their darker inclinations, which help them attain clarity and concentration.
Adopting a Unique Identity
Within the underground, every evil has to find their own niche and become known for themselves. Every villain has their own special brand of evil, whether it’s charm, physical prowess, or a combination of the two.
Navigating Challenges
There are difficulties in living the life of a villain. There are innumerable challenges to our protagonist’s ascent to power, ranging from antagonistic forces to interfering heroes. But they can defeat any enemy that stands in their path if they use shrewd tactics and never give up.
Dealing with Opposition
Both heroic and villainous foes will do everything it takes to foil our hero’s schemes. To prevail over such formidable foes, they must be ready to use cunning and deceit to keep one step ahead of them at all times.
Overcoming Obstacles
How to Live as a Villain Ch 94 is no picnic, just like any other adventure. Our hero faces a multitude of obstacles on their journey to greatness, including financial failures and emotional betrayals. True strength is developed by hardship, and our antagonist comes out the other side more formidable and resolute than before.
Power Dynamics and Influence
Power is the ultimate coin in the domain of villainy. It has the power to change the world and alter the trajectory of history in the hands of the skilled. Our protagonist may become even more formidable by assembling a devoted fan base and skillfully influencing events to their benefit.
Building a Network
On their own, no evil can win. If you want to make it big in the underground, you need friends and confidants who are just as ambitious as you are. Our hero may go much beyond their own talents in terms of impact when they build alliances and strategic collaborations.
Manipulating Situations
Perception is key when it comes to villainy. Our hero may influence public opinion and change the trajectory of events to fit their objective by meticulously managing situations and controlling the narrative. They are able to control everything without physically exerting themselves thanks to their mastery of subtle manipulation and persuasion.
Maintaining Secrecy and Discretion
Caution is of the utmost importance in our environment when each action and word carries weight. The main character has to become good at hiding their genuine objectives beneath a mask of secrecy and deceit if they don’t want to be discovered or exposed.
Flying Under the Radar
Being discreet is essential for a long life in the underworld. To stay alive in a dangerous environment, our protagonist must keep a low profile and avoid taking excessive risks. This will allow them to dodge both competing factions and police enforcement.
Concealing True Intentions
Our hero must master the art of deceiving others by putting on an air of charisma and good intentions in a world where trust is scarce. They skillfully traverse the perilous depths of the underworld by maintaining intimate relationships with both their allies and their foes, ensuring they remain one step ahead of those who would harm them.
Embracing the Darkness
Embracing the shadow side that resides in each of us is what it means to live the villain life. It entails rationalizing one’s acts in the quest of power and glory, which inevitably comes with ethically problematic decisions.
Accepting Morally Ambiguous Choices
No simple decisions exist in the realm of villainy. In order to make morally sound decisions, our protagonist must first understand that each action has repercussions. By facing their shadow selves head-on, they will be able to make the sacrifices that are essential to reaching their objectives.
Justifying Actions
Being a villain involves living a life apart from traditional morals. In order to achieve their goals, our protagonist must learn to rationalize their acts, putting aside moral principles. The risks are high, but the payoff is enormous for those who are brave enough to walk it.
Consequences of Villainy
The problem is that there are repercussions for every choice you make when you have a lot of power. The protagonist faces peril and uncertainty on the road to villainy, and their decisions will impact their fate for years to come.
Facing Retribution
Justice is always on the way in a villain’s universe. There are several forces working to pull our protagonist down, ranging from jealous enemies to heroic allies. However, with a combination of shrewd planning and resolute will, they may triumph over any challenge.
Coping with Guilt and Remorse
However, not even the most ruthless monster can resist feelings of shame and self-doubt. In light of the toll that our protagonist’s decisions have on people closest to them, they must face the music and figure out how to bear the weight of their own shame and regret. Though few are up to the challenge, the payoff is great for those who are willing to face the shadows head-on.
Conclusion
Last but not least, being a villain is a tough life. Doing so calls for guts, resolve, and an openness to facing the shadow side of ourselves. However, the payoff is immeasurable for individuals who are willing to walk the dark road of villainy. Therefore, my dear reader, embrace your inner villain and let the shadows to lead you to greatness.
FAQs:
Is it possible to live as a villain in the real world?
Beware of the legal ramifications and potential harm that come with How to Live as a Villain Ch 94 in the real world. Instead than trying to be a badass in real life, it’s more fun to read about it or watch movies about villains.
What are some examples of famous fictional villains?
Darth Vader of Star Wars, Voldemort of Harry Potter, and The Joker of Batman are just a few examples of well-known fictional villains.
Can villains ever be redeemed?
Everyone has their own idea of what it means to be redemptive. Some villains may be able to change their ways by sacrificing themselves or performing heroic deeds, but others may be doomed to evil from the beginning to the finish.
What motivates someone to become a villain?
Many things might motivate a villain to act in a villainous way, including the desire for power, vengeance, money, or even just to defy social conventions and expectations.
Are there any real-life examples of individuals who have embraced villainy?
Even though bad people have existed throughout history, it’s vital to keep in mind that villainy is relative and frequently relies on who you ask.
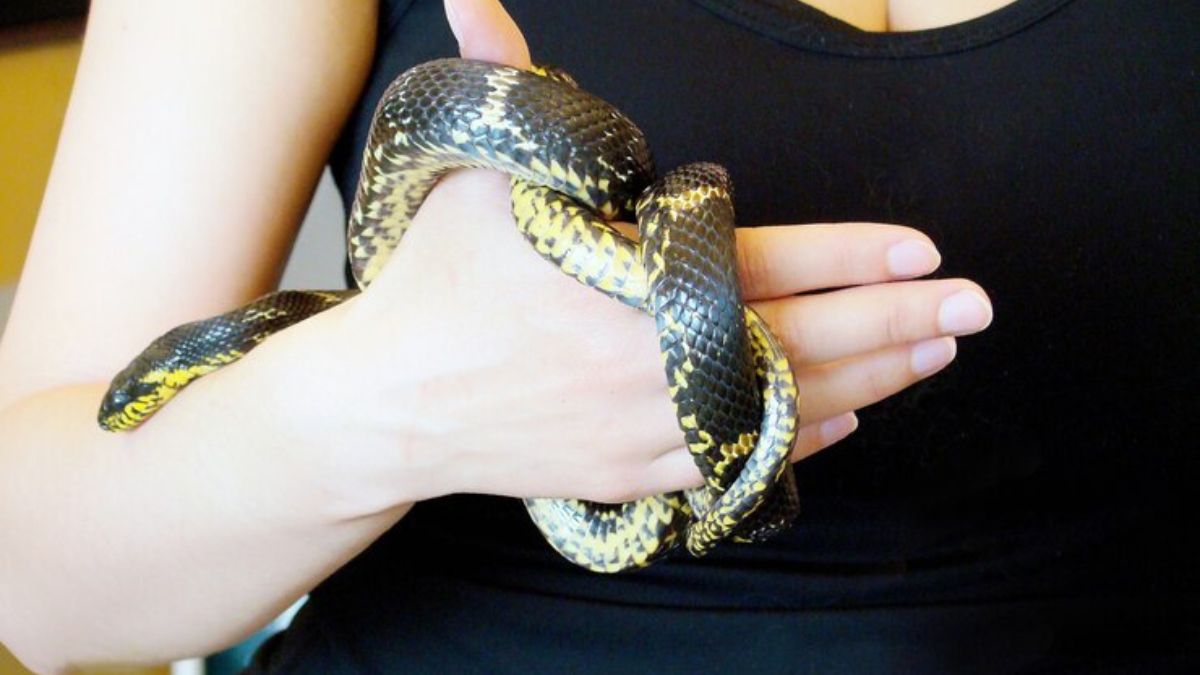
Introducing Fit Kitty and Yumi Sin, two fascinating feline friends that will add a touch of mystery and allure to your life as a pet owner. To properly care for these snakes as pets, one must be knowledgeable of their habits, provide them with an optimal environment, and use gentle handling techniques. If you want to have a peaceful relationship with your slithery snake companions, this book will teach you how to properly care for them. Come and learn about snakes with us as we delve into the fascinating world of snake handling, sharing stories of snake delight, feeding patterns, health concerns, and unique personalities. In this enthralling guide, you will learn all about How to Handle Yumi Sin and Fit Kitty, as well as the pleasures and sorrows of being a snake owner.
Understanding Snake Behavior
Instincts have a significant role in shaping snake behavior. Because of their individuality, Yumi Sin and Fit Kitty have characteristics that need for particular care. In order to coexist peacefully with your snake pets, it is essential that you comprehend their habits.
Creating a Comfortable Habitat
To properly care for snakes, it is essential to provide an atmosphere that is as close as possible to their native habitat. Yumi Sin and Fit Kitty can only thrive in an environment with the ideal humidity, temperature, and hiding places.
Feeding Guidelines
The well-being of your pet snakes depends on your careful attention to their nutrition. This article will discuss the unique nutritional requirements of Yumi Sin and Fit Kitty, including how often they should be fed and how much they should eat each day.
Handling Techniques
A calm demeanor and light touch are necessary while dealing with snakes as pets. To provide a pleasant handling experience for you and your serpentine friends, Yumi Sin and Fit Kitty, we will offer advice on how to establish confidence with them.
Health and Wellness
Happy snakes are healthy snakes. Acquire the ability to identify the early warning signals of illness and wellness. We’ll go over some preventative steps that you can take to ensure that Fit Kitty and Yumi Sin stay healthy.
Enrichment Activities
Even though snakes have a bad connotation, they really thrive when challenged physically and mentally. Find out what kinds of enrichment activities Yumi Sin and Fit Kitty may participate in to keep themselves occupied and happy.
Socialization
The social growth of snakes as pets depends on your exposing them to new places and helping them form good relationships with people and other animals.
Grooming and Shedding
Snake owners must have a thorough understanding of the shedding process. Here are some pointers to help Yumi Sin and Fit Kitty through this normal, though not always easy, stage of their lives.
Common Misconceptions
In order to help you become a responsible pet owner, we will debunk several myths and misconceptions regarding snake care and address them.
Yumi Sin and Fit Kitty Stories
Yumi Sin and Fit Kitty’s distinct characteristics can be better understood from first-hand tales from snake owners. Based on personal experiences, these stories provide useful advice.
Snake-Proofing Your Home
To ensure Yumi Sin and Fit Kitty’s safety, it is vital to take precautions to safeguard your living space and prevent any possible escapes.
Emergency Preparedness
It is critical to be ready for situations with snakes. We’ll go over the steps of making an emergency plan and stress the significance of being familiar with the vets in your area.
Community Resources
Join online groups where others share your passion for snakes. Join Yumi Sin and Fit Kitty on a journey together by sharing stories, getting guidance, and creating a support system.
Conclusion
Finally, it takes an equal amount of expertise, persistence, and devotion to care for snakes as pets, such as How to Handle Yumi Sin and Fit Kitty. If you follow these rules, your relationship with your one-of-a-kind serpentine friends will be rich and rewarding.
FAQs:
How often should I feed Yumi Sin and Fit Kitty?
Snakes’ feeding schedules are species and age dependent. For specific recommendations, see a vet who specializes in caring for reptiles.
Can Yumi Sin and Fit Kitty be trained?
Snakes may not be as receptive to teaching as dogs, but they may still acquire familiar faces and habits.
What do I do if Yumi Sin or Fit Kitty refuses to eat?
Appetite loss is common but should not be taken lightly if it persists for an extended period of time. Seek advice from a veterinarian.
Is it safe to let Yumi Sin and Fit Kitty roam freely in the house?
Although supervised exploration has many advantages, it is important to make sure the area is safe to avoid escapes.
How do I find a reliable vet for Yumi Sin and Fit Kitty?
To locate a qualified reptile vet, ask around in reptile groups or check internet directories for referrals.

Enthusiasts of all stripes how early to arrive at homat idol fest for the thrilling music experience. Make sure you know what time to arrive in order to enjoy this musical spectacular to the fullest. In this detailed guide, we’ll discuss the best times to attend Homat Idol Fest, draw on our own experiences, and offer helpful pointers to ensure that you have an amazing day.
Arrival Strategies for Homat Idol Fest
It takes preparation to get into Homat Idol Fest without a hitch. Find out how to beat the crowds and make the most of the time before the event by learning about various arrival techniques.
Early Bird Benefits
Find out why getting to Homat Idol Fest early is so rewarding. Coming early has several benefits, including getting the finest seats and experiencing unique entertainment before the event.
Navigating the Crowd: A Pro’s Guide
It takes skill to make your way through the festive throng. Gain entry to popular areas without a hitch by learning secret strategies for navigating the crowds.
Homat Idol Fest Schedule Insights
It is essential that festival goers are familiar with the program. Make sure you don’t miss a moment by delving into the specifics of the Homat Idol Fest schedule.
Optimal Time for Front Row Views
Time is of the essence for die-hard fans who want to sit first row. Learn when it’s best to get there so you can get that prime location right by the stage.
Balancing Early Arrival with Comfort
You must strike a balance between being punctual and being comfortable. Here are some tips to help you make the most of your early arrival without compromising your health throughout the event.
Homat Idol Fest: A Personal Experience
Set off on an adventure via your very own Homat Idol Fest. Hear the festival’s enchantment described by an attendee who has experienced it for themselves.
Pre-Event Attractions: What Not to Miss
There is more to Hatat Idol Fest than only the major acts, so be sure not to miss the pre-show attractions. Get ready for an unforgettable festival experience by checking out the pre-event attractions.
Expert Tips for Homat Idol Fest
Ask the knowledgeable festival-goers for advice. Learn the ins and outs of Homat Idol Fest so you can have the best time possible.
Optimizing Your Festival Day
The best way to make the most of your festival day is to make a customized agenda. Make sure you don’t miss any of your favorite acts by learning how to organize your schedule.
How Early to Arrive at Homat Idol Fest
We go into detail on when to get to Homat Idol Fest in this part. Find out when it’s best to do things by considering things like the lineup, the audience dynamics, and your own preferences.
Conclusion
Being early to Homat Idol Fest is a skill that, if mastered, will open an incredible experience. You won’t miss a thing at the event if you follow the methods we’ve provided. Embrace the enchantment, the melodies, and the memories that will make Homat Idol Fest an unforgettable experience.
FAQs:
Q: Is arriving early necessary for enjoying Homat Idol Fest?
Your festival experience is much improved if you get there early. Get a feel for the festival vibe, check out the pre-event events, and get a better perspective.
Q: How can I beat the crowd at Homat Idol Fest?
You need a strategy if you want to beat the crowd. Think about getting there early, finding different entrances, and getting to know less crowded ways before the official start time.
Q: What are the benefits of arriving early at Homat Idol Fest?
You may enjoy unique pre-show activities, get good viewing places, and have a more relaxing festival experience if you arrive early.
Q: Can I balance early arrival with comfort at the festival?
Sure thing! Make the most of your comfort by planning your arrival time. To make sure you have a great time at Homat Idol Fest, remember to bring the necessities like a picnic lunch, sunscreen, and a folding chair.
Q: Are there specific times for optimal front-row views?
Yes, you can improve your odds of getting a front-row seat by getting there early to popular shows. Before you arrange your arrival, make sure to check the itinerary and take into consideration any popular performers.
Q: What pre-event attractions should I not miss at Homat Idol Fest?
Marvel at the interactive exhibits, kiosks selling food, and booths selling products. These activities will enhance your Homat Idol Fest experience even further.
-

 TECHNOLOGY1 month ago
Revolutionizing Customer Experience: The Rise of Tech-Driven Dining
-

 TECHNOLOGY2 months ago
Enhancing Efficiency in Product Design: The Evolution of CAD Automation Technology
-

 HEALTH1 month ago
The Impact of Dental Insurance Brokers on Consumer Choices
-

 SEO1 month ago
Exploring the Impact of SEO on Fashion E-commerce Success
-

 TECHNOLOGY1 month ago
The Evolution of Self-Service: How Self-Storage Kiosks Are Shaping the Future of Personal Storage
-

 BUSINESS1 month ago
Identifying the Right Fit: Essential Qualities to Look for When Hiring Office Personnel
-

 FASHION1 month ago
Freetress Water Wave Hair: Enhance Your Style with Versatile Beauty
-

 FASHION2 months ago
Unveiling the Essence of Jordan 4 Alternate 89